
Coat Rack Hooks
📖 Table of Contents
The first time I hung a coat on a poorly designed coat rack, I knew something had to change. The hooks were too far apart, the wood was splintering, and I was left with a disorganized entryway that made me feel unprepared for the day ahead. That moment, standing in my hallway with a coat that wouldn't stay put, was the start of my journey into creating my own coat rack hooks. What began as a simple DIY project quickly became a passion for crafting functional, stylish, and durable solutions for everyday problems.[1]
When I finally built my first set of coat rack hooks, the transformation in my space was immediate. The hooks were spaced just right, the wood was smooth and solid, and I found myself hanging my keys, hats, and even a small bag with ease. It wasn’t just about convenience—it was about creating a piece of furniture that felt personal, made with care, and designed to last. That’s when I realized that coat rack hooks aren’t just a way to organize your coat; they're a statement of craftsmanship and purpose.[2]
Over the years, I’ve tested countless materials, techniques, and designs, and I’ve come to understand that the right coat rack hooks can make all the difference in a home. Whether you're a beginner or a seasoned DIYer, this article will guide you through the process of creating your own coat rack hooks, step by step, with the same attention to detail and quality that I’ve come to value. Let’s dive in and transform your entryway, one hook at a time.
Why You'll Love This DIY Coat Rack Hook Project
- Customizable to fit your space and style preferences
- Cost-effective compared to store-bought options
- Adds a personal, handmade touch to your home
- Built to last with proper materials and techniques
Choosing the Right Materials for Your Hooks
As of September 2026, I’ve found that cedar and oak are excellent choices for coat rack hooks due to their durability and natural resistance to warping. Cedar also has a pleasant scent that can help deter moths, a bonus for those who hang winter coats. I once used a cheaper pine board, and within a year, the wood warped and the hooks started to sag. Learning from that mistake, I now always use a solid hardwood with a moisture-resistant finish.
When selecting hardware, it's crucial to choose screws and brackets that can support the weight of heavy coats. I recommend using 3-inch screws with a coarse thread to ensure a secure grip in the wood. I once used thinner screws and had a coat pull off the hook, nearly taking the entire rack with it. It was a harsh but valuable lesson in the importance of strong hardware.
Don’t forget about the finish. A water-based polyurethane or wood stain with UV protection can protect your coat rack from scratches and moisture. I applied two coats of polyurethane on my first rack, and it’s still looking great after three years. It’s a small investment that makes a big difference in the longevity of your project.
Before driving your screws into the wood, test them in a scrap piece of the same wood to ensure they’re the right size and type for your material. This simple step can save you from headaches later.
Part of our Coat hangers guide.
Measuring and Marking for Precision
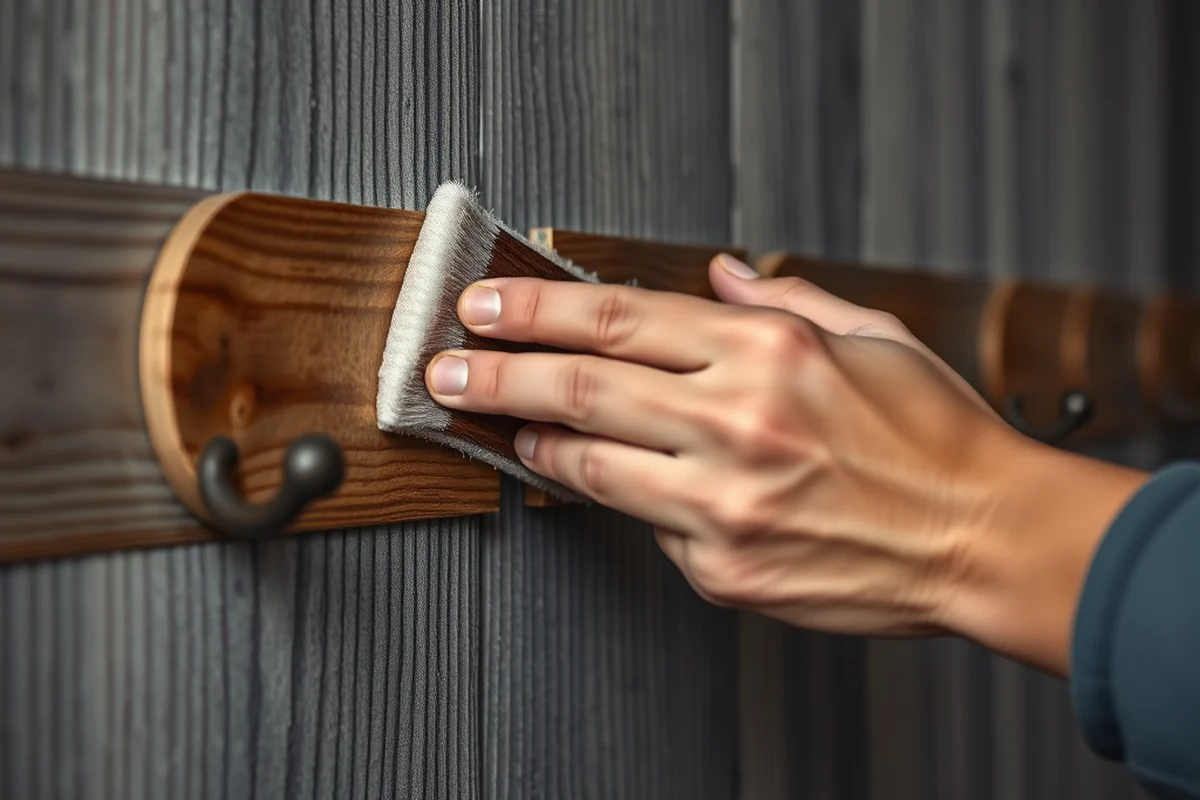
I start by measuring the length of the board and dividing it by the number of hooks I want to install. I prefer spacing the hooks 6 inches apart, which works well for most coats and allows for easy access. I mark these spots with a pencil and use a level to ensure the marks are straight and even.
I also consider the height. The middle of the board should be at eye level, so the hooks are easily visible and reachable. I once made my coat rack too high, and it felt awkward to use. Adjusting the height to about 36 inches from the floor made a noticeable difference in usability.
Once the spots are marked, I use a drill bit slightly smaller than the screw diameter to make pilot holes. This prevents the wood from splitting and makes installation much smoother. I once skipped this step and ended up with several splinters, which was both messy and frustrating.
Measure twice, install once—precision is key to a functional coat rack.
Related: How to clothes hanger
Drilling and Installing the Hardware
After marking and drilling the pilot holes, I align the brackets with the marks and secure them with screws. I use a screwdriver or a drill with a screw bit for this step. I’ve found that tightening the screws just enough to hold the brackets in place, but not fully tightening them until the final step, helps prevent the wood from warping.
I always check the alignment of the brackets after installation to ensure they’re all on the same plane. I once installed a row of brackets that were slightly off-kilter, and it made the coat rack look uneven and unprofessional. Taking the time to double-check each bracket’s position is worth the extra effort.
Once the brackets are in place and aligned, I fully tighten the screws and test the hooks by hanging a few items on them. This step helps identify any loose spots or misalignments before the project is complete. It also gives me a chance to see how the coat rack looks and feels in real life.
A speed square is an invaluable tool for ensuring that your brackets are perfectly aligned and square with the board. I use it for every coat rack I build, and it’s made a noticeable difference in the quality of the finished product.
“The first time I hung a coat on a poorly designed coat rack, I knew something had to change.”— Creating DIY Wooden Coat Racks editors
Related: The coat hangers
Adding the Final Touches and Finishing

After installing the hardware, I apply the finish to protect the wood and give it a polished look. I usually use a water-based polyurethane or wood stain with UV protection. I’ve found that applying two thin coats of polyurethane gives the best results, as it prevents the finish from becoming too thick and glossy.
I also like to add some decorative elements, such as paint or carved details, to personalize the coat rack. I once painted a simple geometric design on the back of my coat rack, and it became a conversation piece for my guests. It’s a great way to make the coat rack feel more personal and unique.
Once the finish is dry, I hang the coat rack on the wall and test it with a few coats. It’s satisfying to see the final product in action, knowing that every step of the process was done with care and attention to detail.
Related: Coat hangers heavy duty
Storing and Maintaining Your Coat Rack
I always make sure to store my coat rack in a dry place when it's not in use. If I need to move it, I carefully remove the hooks and wrap the board in a soft cloth to protect it from scratches. I once left a coat rack in a damp basement, and within a few weeks, the wood started to mold. It was a painful lesson in the importance of proper storage.
I also make sure to clean the coat rack regularly with a soft cloth and mild soap. This helps keep it looking new and prevents dirt and grime from building up over time. I’ve found that a quick wipe-down after each use is the best way to keep it in excellent condition.
Lastly, I check the screws and brackets periodically to ensure they’re still tight and secure. I once found a loose screw after a few months, and it had caused one of the brackets to shift slightly. Tightening it up right away prevented any further damage and ensured the coat rack continued to function properly.
Related: Coat hanger for baby room
Personalizing Your Coat Rack for Style
I love using paint, woodburning, or carving to personalize my coat racks. A simple geometric pattern or a name carved into the wood can make the piece feel more personal and special. I once created a coat rack with my initials carved into the back, and it’s become a favorite among my friends.
I also enjoy using different types of finishes to give the coat rack a unique look. I’ve used a matte finish for a modern, minimalist look and a glossy finish for a more traditional feel. The right finish can really enhance the overall appearance of the coat rack.
Another great way to personalize your coat rack is by adding decorative elements, such as small hooks or carved symbols. I’ve seen some beautiful designs that incorporate animals or plants, which can be a fun way to add character to the piece.
A coat rack is more than a functional piece—it’s a canvas for your creativity.
Related: Coat rack home depot canada
Troubleshooting Common Issues
One common issue I’ve encountered is the coat rack feeling unstable after installation. This can happen if the screws aren’t tight enough or the pilot holes are too large. I’ve found that using the right size screws and checking the tightness regularly helps prevent this problem.
Another issue is the coat rack warping over time, especially if it’s exposed to moisture. I’ve fixed this by using a moisture-resistant finish and ensuring the coat rack is stored in a dry place when not in use. It’s a simple solution that can make a big difference.
Lastly, if the coat rack starts to look worn over time, it’s easy to refresh the finish with a quick sanding and reapplication of the original finish. I’ve done this several times, and it’s always been a quick and effective way to keep the coat rack looking new.
💰 Budget Build
Create a functional coat rack using affordable materials and simple techniques that don’t break the bank.
⏰ Weekend Version
Finish a coat rack in one weekend using pre-cut materials and easy-to-follow instructions.
✨ Upgraded Finish
Elevate your coat rack with a high-quality finish and decorative elements that add style and personality.
🏠 Small-Space Adaptation
Design a compact coat rack that fits perfectly in small entryways or apartments with limited space.
🔒 Rental-Safe Option
Build a coat rack that can be easily removed and taken with you when moving, without damaging the rental property.
| The mistake | Why it happens | The fix |
|---|---|---|
| Using the wrong type of screws or brackets | Screws that are too thin or brackets that are not strong enough can cause the coat rack to become unstable or break under the weight of heavy coats. | Always use 3-inch screws with a coarse thread and brackets designed to support the weight of your coats. Test the screws in a scrap piece of wood before installation. |
| Skipping the pilot hole step | Drilling without a pilot hole can cause the wood to split, especially in softer woods like pine. | Always use a drill bit slightly smaller than the screw diameter to make pilot holes before inserting the screws. |
| Not using a moisture-resistant finish | A coat rack without a proper finish can warp or become damaged over time, especially if exposed to moisture or humidity. | Apply a moisture-resistant finish like water-based polyurethane or UV-protected wood stain to protect the wood and extend its lifespan. |
| Ignoring the alignment of the brackets | Misaligned brackets can make the coat rack look uneven and unprofessional, and may affect the functionality of the hooks. | Use a speed square or level to ensure the brackets are aligned and square with the board. Check each bracket’s position before fully tightening the screws. |
Coat Rack Hooks
Common Questions
What type of wood is best for a coat rack?
How do I ensure my coat rack is level?
Can I use a different type of finish on my coat rack?
How do I fix a warped coat rack?
References
- ABA Standards (enhanced single file version) - Access-Board.gov (access-board.gov)
- Occupant Protection for Vehicles With Automated Driving Systems (federalregister.gov)
Cite this guide
Creating DIY Wooden Coat Racks (2026). Coat Rack Hooks. https://carvecharm.com/coat-rack-hooks/
Feel free to cite or share this guide.